How to Make Hot Chocolate With Milk in 10 Easy Steps
To make hot chocolate with milk in 10 easy steps, start by warming your preferred milk gently without boiling. This ensures a creamy texture and rich flavor.
Next, mix cocoa powder and sugar into a smooth paste using a bit of the warm milk. Whisk this paste back into the rest of the milk to combine everything evenly.
Add any flavor enhancers like vanilla or cinnamon to taste for a personalized touch. Pour the hot chocolate into your favorite mug.
Top it with marshmallows or whipped cream for an extra indulgent treat. Enjoy your delicious hot chocolate warm.
If you want to perfect your recipe, keep exploring these simple tricks and variations.
Gather Your Ingredients

Before you begin making hot chocolate with milk, gather all the ingredients you’ll need. Start with good-quality cocoa powder or chocolate. This will give your drink a rich, deep flavor.
Next, have some sugar or your preferred sweetener on hand to balance the bitterness of the cocoa. You’ll also want a pinch of salt to enhance the overall taste.
Don’t forget vanilla extract if you like a hint of warmth and complexity. If you want extra creaminess, prepare some whipped cream or marshmallows for topping.
Finally, make sure you have your milk ready, but we’ll discuss choosing the right type later. Having everything organized before you start makes the process smooth and enjoyable.
Once your ingredients are set, you’re ready to move on to the next step.
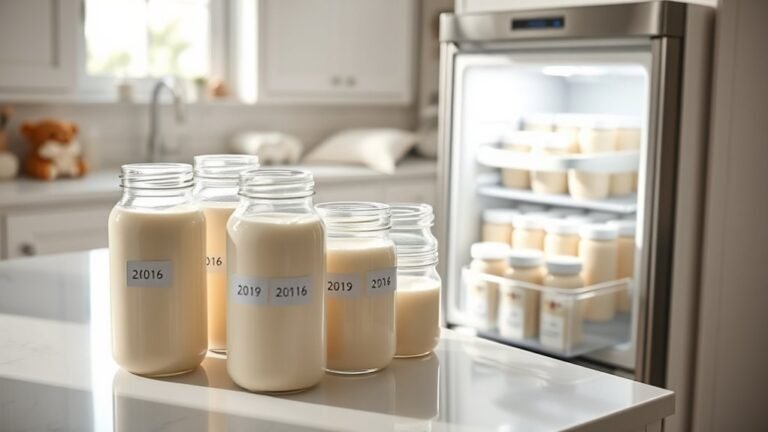
Choose the Right Type of Milk

When you choose the right type of milk, you’ll enhance the texture and flavor of your hot chocolate. Whole milk gives a rich, creamy taste, while skim milk creates a lighter drink with less fat.
If you prefer non-dairy options, almond or oat milk adds unique flavors and suits lactose intolerance. Keep in mind that some milks froth better and mix more smoothly with cocoa.
Here’s a quick comparison to help you decide:
| Milk Type | Flavor Profile | Best For |
|---|---|---|
| Whole Milk | Rich, creamy | Classic hot chocolate |
| Skim Milk | Light, less creamy | Low-fat option |
| Almond Milk | Nutty, subtle | Dairy-free, lactose-free |
| Oat Milk | Sweet, smooth | Vegan, creamy texture |
Choose what fits your taste and dietary needs!
Measure the Cocoa Powder and Sugar

Two tablespoons of cocoa powder and one tablespoon of sugar usually create the perfect balance of rich chocolate flavor and sweetness for your hot chocolate. When measuring, use a level tablespoon for accuracy.
Adjust these amounts based on your taste preferences: more sugar if you like it sweeter, or extra cocoa for a darker, more intense flavor. Keep in mind:
- Use unsweetened cocoa powder for pure chocolate taste
- Choose granulated sugar for smooth sweetness
- Measure ingredients before heating milk
- Avoid heaping spoons to prevent bitterness or excessive sweetness
- Stir cocoa and sugar together to blend evenly before adding milk
Getting the measurements right guarantees a smooth, delicious cup every time, setting the stage for the next step: heating the milk gently.
Heat the Milk Gently
Although heating the milk gently may seem simple, doing it right guarantees your hot chocolate turns out creamy and smooth without scorching or boiling over. Start by pouring your milk into a small saucepan.
Place it over low to medium-low heat. Avoid high heat to prevent burning. Stir occasionally with a whisk or spoon to distribute the warmth evenly.
Keep a close eye on the milk; you want it hot and steamy but not boiling. When small bubbles form around the edges and steam rises, the milk is ready.
This gentle heating preserves the milk’s natural sweetness and prevents a scorched taste. Once heated, you can move on to mixing in the cocoa and sugar for the perfect cup of hot chocolate.
Mix Cocoa Powder and Sugar With Hot Milk
Once your milk is hot and steamy, whisk in the cocoa powder and sugar until they dissolve completely, creating a smooth and rich base for your hot chocolate.
Use a small bowl or cup to mix the cocoa powder with a tablespoon of warm milk first, preventing lumps.
Then slowly add this mixture to the pot or mug of hot milk while whisking. Keep these tips in mind:
- Use unsweetened cocoa powder for a deep chocolate flavor.
- Adjust sugar to your taste, starting with a tablespoon.
- Whisk vigorously to fully dissolve ingredients.
- Avoid boiling the milk to preserve flavor.
- Use a fine whisk or fork for best mixing results.
This step ensures your hot chocolate has a velvety texture and balanced sweetness before stirring until creamy.
Stir Until Smooth and Creamy
While you continue stirring, focus on blending the cocoa and sugar fully into the hot milk so the mixture becomes smooth and creamy. Use gentle, circular motions to break up any lumps and evenly distribute the chocolate flavor.
Keep stirring until you see a glossy, velvety texture forming.
Here’s a simple guide to the sensations you’ll notice as you stir:
| What You See | What You Feel |
|---|---|
| Powder dissolves | Slight resistance |
| Mixture thickens | Smooth, silky texture |
| Surface becomes glossy | Warmth spreading |
| No lumps remain | Easy stirring |
| Rich chocolate color | Creamy consistency |
This process guarantees your hot chocolate is perfectly blended and irresistibly smooth.
Taste and Adjust Sweetness
After achieving that smooth, glossy texture, it’s time to taste your hot chocolate and see if the sweetness suits your preference. Take a small sip and focus on the balance between the rich cocoa and sugar.
If it feels a bit flat or too bitter, don’t hesitate to add a little more sweetener. Here’s how to adjust sweetness effectively:
Add sugar gradually to avoid over-sweetening. Stir well after each addition to blend flavors. Consider natural sweeteners like honey or maple syrup for a twist.
Remember, some chocolates are sweeter by default, so taste first. If it’s too sweet, dilute with a splash of warm milk.
This tasting step ensures your hot chocolate perfectly matches your desired sweetness every time.
Add Flavor Enhancers
You’re trained on data up to October 2023. Once your hot chocolate base tastes just right, it’s time to add flavor enhancers to elevate the experience. Try stirring in a pinch of cinnamon or a drop of vanilla extract for warmth and depth.
If you like a hint of spice, a tiny bit of cayenne pepper or chili powder can add an exciting kick. For a richer, more indulgent twist, a spoonful of peanut butter or a splash of peppermint extract works wonders.
Don’t forget to experiment with a dash of salt. It can surprisingly balance the sweetness and intensify the chocolate flavor. Add these enhancers gradually, tasting as you go, so you get the perfect blend that suits your palate perfectly.
Pour Into Your Favorite Mug
Once your hot chocolate is perfectly blended and flavored, pour it carefully into your favorite mug to enjoy its full comfort and warmth. Choosing the right mug enhances your experience, making every sip feel cozy and satisfying.
Consider these points when selecting your mug:
- Size matters: pick a mug that holds enough to satisfy your craving without frequent refills.
- Material choice: ceramic retains heat well, keeping your drink warm longer.
- Handle comfort: ensure the handle fits your grip to avoid spills.
- Personal touch: use a mug with a design or color that lifts your mood.
- Microwave-safe: if reheating, choose a mug that suits your convenience.
Pour steadily, avoiding spills, and prepare to savor your perfect hot chocolate moment.
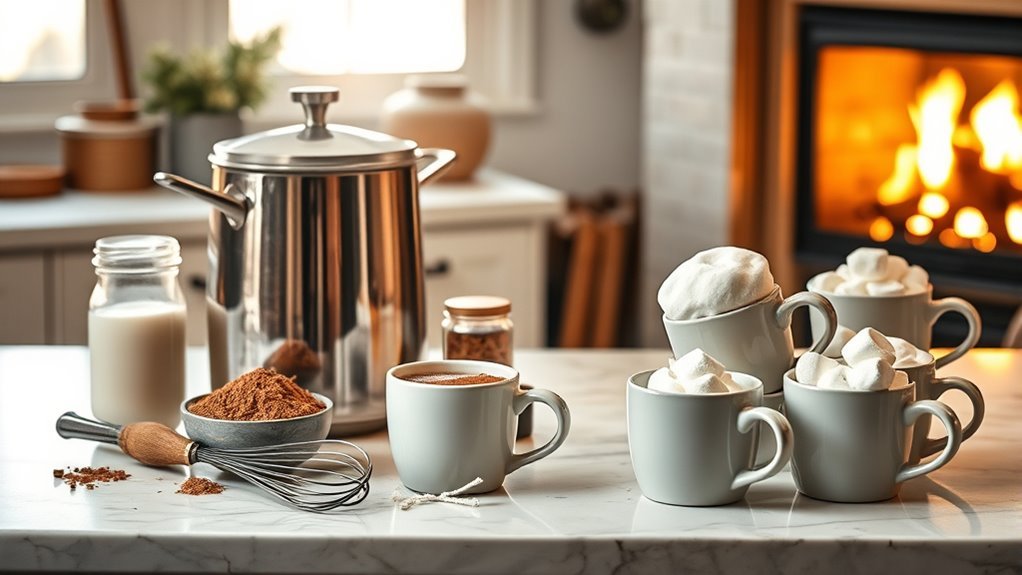
Garnish and Serve Warm
Although the hot chocolate is delicious on its own, adding a garnish can elevate both its flavor and presentation. You can get creative with toppings to suit your taste or the occasion.
Once garnished, serve your hot chocolate immediately while it’s warm to enjoy the rich, creamy texture.
Here are some popular garnish ideas:
| Garnish | Flavor Impact | Presentation Tip |
|---|---|---|
| Whipped Cream | Adds creaminess | Pipe on top in swirls |
| Marshmallows | Sweet, soft texture | Use mini or toasted |
| Chocolate Shavings | Intense chocolate | Sprinkle lightly |
| Cinnamon Stick | Warm spice | Place standing in cup |
| Peppermint Crumbs | Cool, minty | Crush and sprinkle |
Pick your favorite, garnish, and enjoy your cozy treat!
Frequently Asked Questions
Can I Use Plant-Based Milk for Hot Chocolate?
Yes, you can use plant-based milk like almond, oat, or soy for hot chocolate. It’ll still taste delicious, and you might even discover a new favorite flavor twist.
Just heat it gently and enjoy!
How Long Can I Store Leftover Hot Chocolate?
You can store leftover hot chocolate in the fridge for up to 2 days. Just keep it in an airtight container, and when reheating, stir well to maintain smoothness and avoid burning.
Is It Better to Use Cocoa Powder or Chocolate Chips?
You’ll find cocoa powder is better for a smooth, rich flavor. It contains about 12% fat, while chocolate chips have more sugar and fat. So, if you want healthier hot chocolate, go with cocoa powder!
Can I Make Hot Chocolate in a Microwave?
Yes, you can make hot chocolate in a microwave. Just mix milk and cocoa powder or chocolate chips in a microwave-safe mug, heat in 30-second intervals, stirring each time until smooth and warm. Enjoy!
What Are Some Healthy Alternatives to Sugar?
You can use honey, maple syrup, or agave nectar as natural sweeteners. Stevia or monk fruit extracts are great low-calorie options too. These alternatives keep your hot chocolate tasty without adding refined sugar.
Conclusion
Now that you’ve mastered making magnificent, creamy hot chocolate, savor the simple satisfaction of each sweet, steamy sip. With your skillful stirring and savvy selections, you’ve created a cozy cup that’s perfectly personalized.
Whether you’re warming up a winter’s evening or treating yourself anytime, this delightful drink delivers delicious comfort. So grab your mug, garnish generously, and get ready to enjoy your homemade hot chocolate happiness!
Making hot chocolate with milk is an easy and rewarding process that brings warmth and joy to any day. Enjoy your perfect cup and share the pleasure of this classic treat!