How You Can Make Heavy Cream From Milk at Home
You can make heavy cream at home by combining cold whole milk with melted unsalted butter to boost fat content, then chilling the mixture for a rich, creamy texture. This simple method helps you create a homemade alternative to store-bought heavy cream using basic ingredients.
Alternatively, let fresh full-fat milk sit undisturbed in a clean container for 24 hours to let the cream rise, then carefully skim it off. Using fresh ingredients and keeping everything chilled helps achieve the best results.
Keep going to discover the full process and helpful tips. With these easy techniques, you can enjoy homemade heavy cream whenever you need it.
Understanding the Role of Heavy Cream in Recipes

Although heavy cream might seem like just another dairy product, it plays a crucial role in many recipes by adding richness, texture, and flavor. When you use heavy cream, you’re enhancing the mouthfeel of dishes, making them smoother and more luxurious.
Heavy cream enriches dishes, elevating texture and flavor for a smoother, more luxurious experience.
It thickens sauces and soups, giving them a velvety consistency you can’t achieve with milk alone.
You’ll also find that heavy cream whips up beautifully, creating light, airy toppings for desserts. Its high fat content allows it to hold its shape and add volume.
Whether you’re making a creamy pasta sauce, a luscious dessert, or a decadent soup, heavy cream brings depth and balance.
Understanding its role helps you appreciate why substituting it with lower-fat dairy often changes the outcome.
Essential Ingredients Needed for Homemade Heavy Cream

Before you start making heavy cream at home, you’ll need just a few simple ingredients that work together to replicate its rich texture and flavor. The key is balancing fat content and consistency to mimic store-bought heavy cream.
Here are the essential ingredients you’ll use:
- Whole milk (full-fat for best results)
- Unsalted butter (to boost fat content)
- Milk powder (optional, for extra creaminess)
- Cornstarch or flour (to thicken if needed)
- A pinch of salt (to enhance flavor)
Tools and Equipment Required for Making Heavy Cream

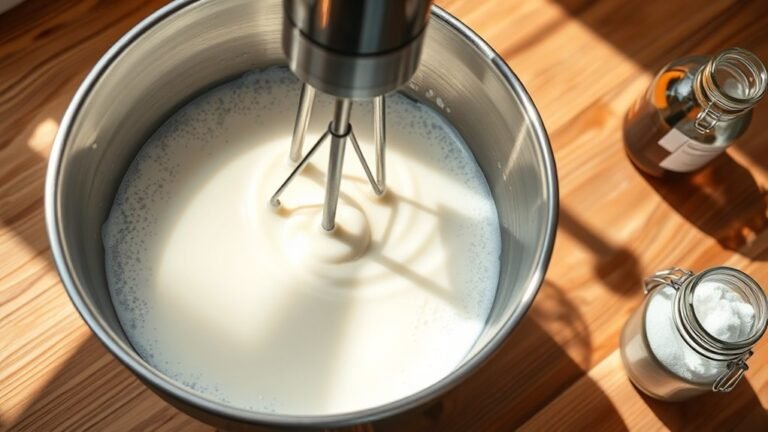
Now that you’ve gathered the ingredients to create homemade heavy cream, you’ll need the right tools to bring everything together smoothly. Start with a large mixing bowl, preferably stainless steel or glass, to hold your milk and any added ingredients.
A whisk or electric hand mixer will help you blend everything thoroughly and incorporate air for the perfect texture.
If you want to separate cream from milk naturally, a clear jar with a lid allows you to let the milk sit undisturbed.
A fine mesh strainer or cheesecloth can come in handy if you want to filter impurities.
Finally, a measuring cup ensures you use precise ingredient amounts.
With these simple tools, you’re all set to make rich, creamy heavy cream right at home.
Step-By-Step Guide to Making Heavy Cream From Milk
Once you have your ingredients and tools ready, start by pouring cold whole milk into your mixing bowl. Chill it well, as cold milk helps the fat separate easier.
Next, let the milk sit undisturbed in the fridge for 24 hours to allow the cream to rise to the top.
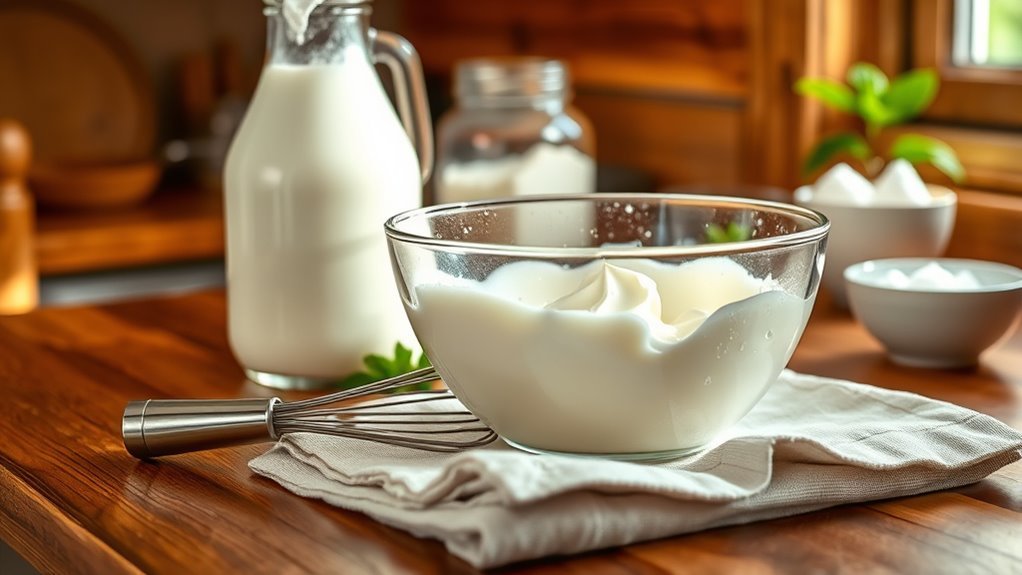
After that, gently skim the thickened layer of cream from the surface using a spoon or small ladle.
Here’s a quick checklist to keep in mind:
- Use fresh, cold whole milk
- Chill milk for at least 24 hours
- Avoid shaking the milk before skimming
- Skim slowly to collect the thick cream layer
- Store skimmed cream in a clean container
Following these steps, you’ll have homemade heavy cream ready for your recipes!
Tips for Achieving the Perfect Creamy Texture
Although making heavy cream from milk is straightforward, achieving the perfect creamy texture requires careful attention to temperature and gentle handling. Start by chilling your milk and utensils; cold conditions help fat globules stay intact and thicken properly.
Chill your milk and tools first to keep fat intact and ensure a perfectly creamy heavy cream.
When whipping or mixing, avoid high speeds that can break down the cream and cause separation. Instead, use slow, steady motions to build smoothness. Keep an eye on consistency—stop whipping as soon as soft peaks form to prevent overworking.
If your cream feels too thin, let it rest in the fridge for a while; this helps it firm up naturally. In the end, always use fresh milk for the best results, since freshness impacts texture and flavor.
Following these tips ensures your homemade heavy cream turns out rich and luxuriously smooth.
Variations Using Different Types of Milk
When you choose different types of milk, you can create heavy cream with unique flavors and textures that suit your recipes. Whole milk is the classic choice, offering a rich and smooth base. If you’re after a lighter option, try low-fat milk, but expect a thinner cream.
For a creamy, slightly sweet flavor, goat’s milk works well. Almond or oat milk can be used for dairy-free versions, but they won’t whip like traditional cream. Raw milk, if available, gives the richest texture due to higher fat content.
Consider these options:
- Whole milk for traditional richness
- Low-fat milk for lighter cream
- Goat’s milk for tangy notes
- Almond or oat milk for vegan alternatives
- Raw milk for maximum creaminess
Experiment to find what best fits your culinary needs.
Common Mistakes to Avoid When Making Homemade Cream
Why does homemade cream sometimes fall short of expectations? Often, it’s because you skip vital steps or use the wrong ingredients. For instance, using low-fat milk won’t give you the richness you want.
Also, don’t rush the process; homemade cream needs time to thicken properly. Avoid shaking or stirring too vigorously, which can break down the fat instead of combining it.
Temperature matters too—if your milk isn’t cold enough, the cream won’t separate well.
In the end, don’t forget to strain the mixture carefully to remove any lumps or solids.
How to Store Your Homemade Heavy Cream Properly
Once you’ve mastered the steps to make rich, creamy homemade heavy cream, storing it correctly will keep that quality intact. You want to maintain freshness and prevent spoilage by handling your cream with care.
Here’s how to store your homemade heavy cream properly:
Use a clean, airtight container to avoid contamination. Keep it refrigerated at or below 40°F (4°C). Store it away from strong-smelling foods to prevent odor absorption. Label the container with the date you made it for quick reference.
Use the cream within 5-7 days for the best taste and texture.
Proper storage guarantees your homemade cream stays delicious and safe to use in your recipes.
Using Homemade Heavy Cream in Cooking and Baking
Since homemade heavy cream offers a richer texture and fresher flavor than store-bought options, you’ll find it elevates both your cooking and baking. Use it to create velvety sauces, creamy soups, or luscious desserts like panna cotta and mousse.
When whipping, homemade cream often whips faster, giving you fluffy peaks perfect for topping pies or hot drinks. You can also substitute it in recipes calling for heavy cream without worrying about additives or preservatives affecting taste.
Just remember to keep it chilled until use to maintain its consistency. Whether you’re making a rich alfredo sauce or a decadent cake frosting, your homemade heavy cream adds that extra touch of freshness and indulgence that truly makes a difference in your dishes.
Nutritional Differences Between Homemade and Store-Bought Heavy Cream
Although both homemade and store-bought heavy cream serve similar culinary purposes, their nutritional profiles can differ markedly. When you make heavy cream at home, you control the ingredients, which often means fewer additives and preservatives.
Store-bought cream may contain stabilizers or thickeners, altering its natural fat and calorie content. Homemade cream typically has a fresher taste and may retain more of the milk’s natural nutrients. However, the fat content in homemade cream can vary depending on the milk you use.
Consider these nutritional differences:
- Homemade cream usually has no added sugars or stabilizers.
- Store-bought cream often lists exact fat percentages.
- Homemade cream’s fat content depends on milk quality.
- Store-bought cream may include additives.
- Homemade cream can be fresher and more nutrient-dense.
Frequently Asked Questions
Can Heavy Cream Be Made From Non-Dairy Milk Alternatives?
You can’t make traditional heavy cream from non-dairy milk since they lack the fat content. But you can create creamy substitutes using coconut milk or cashew cream, which work great for cooking and baking instead.
How Long Does It Take to Separate Cream From Milk Naturally?
You might be surprised, but it takes about 12 to 24 hours for cream to naturally separate from milk when left undisturbed in the fridge.
Patience pays off, revealing that rich layer on top you crave.
Is Homemade Heavy Cream Safe for Infants or Toddlers?
You shouldn’t give homemade heavy cream to infants or toddlers without checking with a pediatrician first. Their digestive systems are sensitive, and homemade cream might carry bacteria or lack proper pasteurization, posing health risks.
Can I Use Ultra-Pasteurized Milk to Make Heavy Cream?
You can use ultra-pasteurized milk, but it won’t whip well or separate like fresh milk. Ultra-pasteurization changes the proteins, so making heavy cream at home might not give you the best results.
What Is the Environmental Impact of Making Cream at Home?
You’ll reduce significant carbon emissions by making cream at home. Dairy production accounts for about 4% of global greenhouse gases.
Plus, you’ll cut packaging waste and transport energy, making your kitchen a greener place overall.
Conclusion
Now that you know how to make heavy cream from milk at home, you can bring a touch of old-world charm to your kitchen. Just like your grandmother might have done before electric mixers and fancy gadgets, you’ll create that rich, creamy texture with simple ingredients and a little patience.
Keep practicing, avoid common pitfalls, and store it right—you’ll soon enjoy homemade cream that elevates every dish. Making heavy cream from milk at home is a rewarding way to enhance your cooking, making it feel timeless and truly special.